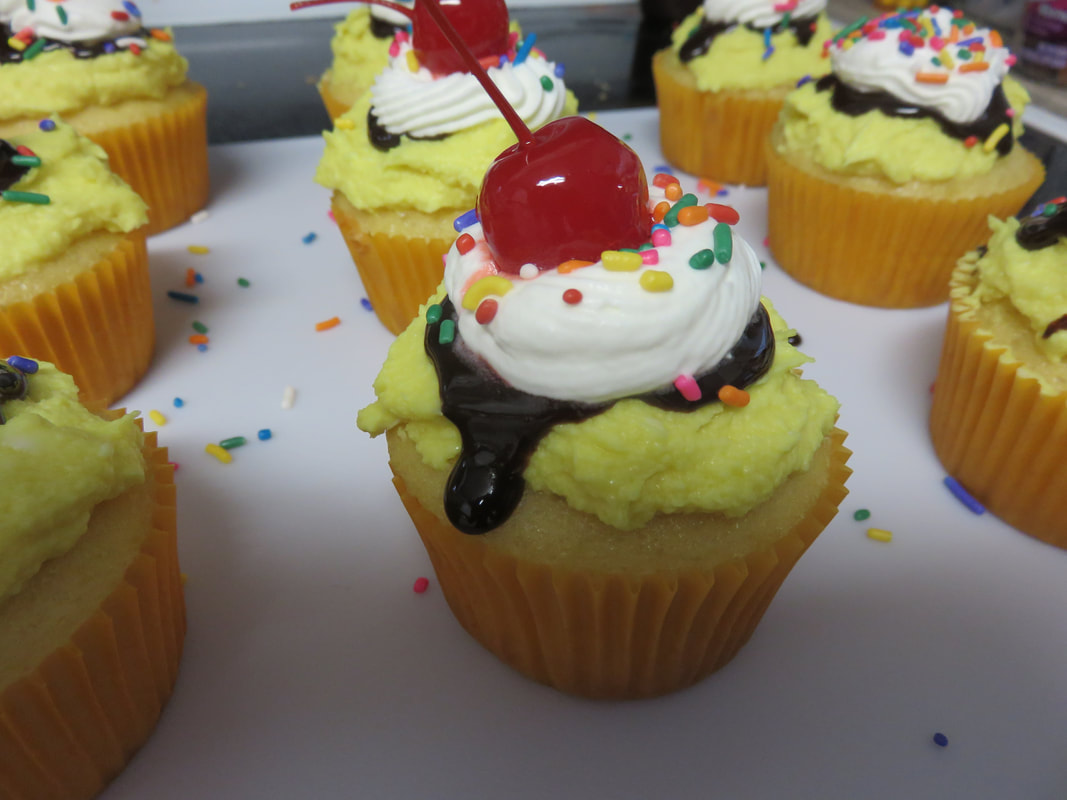
 Since our youngest developed a food allergy, we have become much more aware of how difficult it can be to dine out. One of the hardest things to get are desserts, so trips to Dunkin Donuts, or most any bakery treat have been out for a while now. While the particular treat he might want may not actually have his allergen in it, it could have been exposed to the allergen through cross contact. Cross contact is when chocolate donuts are put on the same pan that ten minutes earlier nuts were sprinkled onto an iced donut. Same thing with cupcakes, muffins, cookies, often pans aren't washed between batches. Unfortunately, just because you don't see the allergen doesn't mean it's not there. The oils and proteins aren't visible from a nut that was dropped, then brushed aside, and that's what can stick to the side or bottom of a treat can cause a reaction. Cross contamination stinks, especially when you are a kid, and just want a fun looking, and tasting dessert. I've always been up for baking, but when my youngest kept talking about all the great cupcakes he had last time, and asking if they were going to be safe or not, I admit my heart broke a little. I told him they might not be, but promised I would learn to make whatever he wanted, and wow has he thrown some doozies at me. Some of them I'm worried to try, but I'm going to figure it out, and help YOU to figure it out too! I've agreed to make one Disney Dessert a month, and chronicle it here, so that I can share how AWESOME, TASTY and EASY it can be to make a Disney Dessert, AND best of all, on a budget! Here is the first he asked me to make, Pop Century's Banana Split Cupcakes, but, with vanilla icing, not banana flavored. If you really want the banana flavored icing, I bet you can find an extract for it at the grocery store. These 24 delicious Banana Split Cupcakes were made for less than the cost of 2 cupcakes at Disney, with leftover ingredients for next time. Ready to learn how? I think you'll like them as much as my baby does! Get ready!
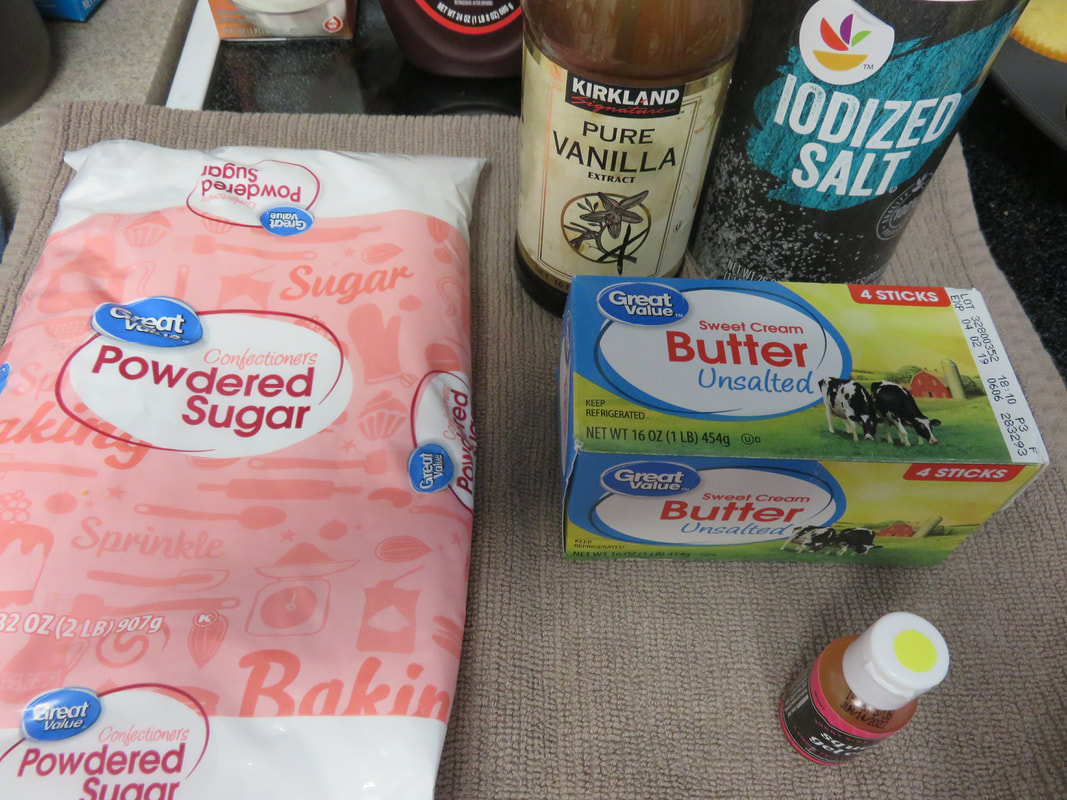
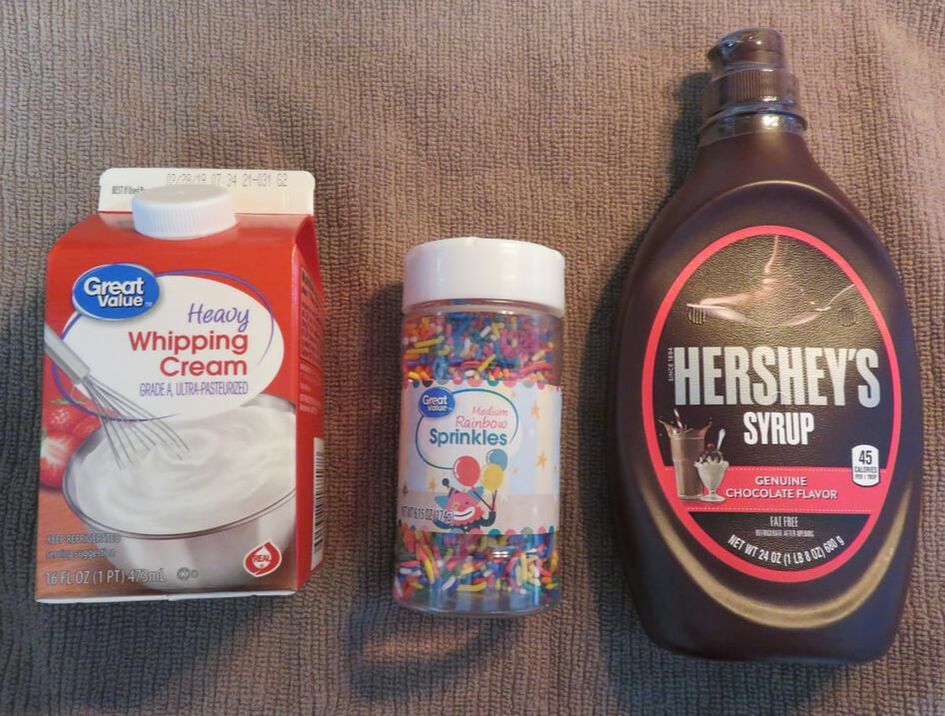
Gather your supplies. You'll need: A yellow box cake mix, your favorite brand plus all the ingredients on the back (not pictured!) Cupcake liners cupcake tins Butter, 2 sticks 1 half bag of confectioners sugar a tbs of milk 1 tsp of vanilla pinch of salt Whipping cream, whipped cream in a can, or cool whip Sprinkles Yellow icing dye Maraschino cherries (not in the picture, I totally forgot to add them!) Hershey's Chocolate sauce Make your batter, and pour into your lined pans. Bake according to instructions. 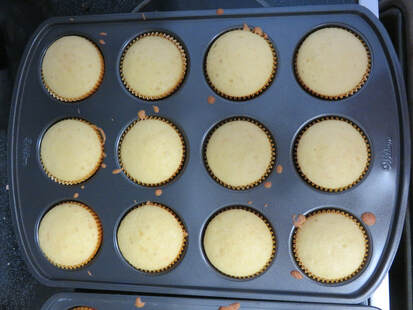 While those are cooling, start to make your icing. If you have a stand mixer, that works best, but a hand mixer can get the job done too. Beat the butter, and confectioners sugar. Add the salt, and vanilla, and drizzling in about half the milk while beating. After about 2 minutes, you will be able to tell if your icing is too stiff. If it is, add a little more milk until the icing is soft enough to push a spoon through, but not so soft a spoon can't sit upright when pushed into your icing without tipping over. If the icing is too soft, maybe it's a hot day, maybe you added too much milk, then add a little more sugar, a spoon full at a time until you get the desired constancy. 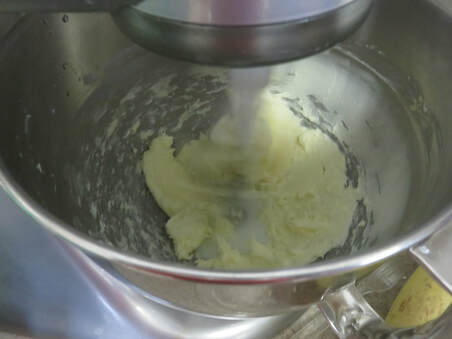 Once your icing is made, color it a cheery yellow. I like this brand of icing, it's a gel, and made in a nut free facility. I bought it at Hobby Lobby, for about $2 a bottle. I really like this better than the Wilton dye I used for so many years. It squeezes out, AND it's safe for my son's allergies.
Now it's time to put the icing on. I didn't pipe the icing on, I didn't see a need to do that, since it's going to be covered up. Just a nice dollop, and then spread almost to the edge. Take your Hershey's Syrup, and make a circle, not quite to the outer edge of your cupcake. The syrup will actually become almost gel like after a few minutes, but in the meantime, if a few drips run down, just looks more like a Banana Split Sundae! I didn't have cool whip or in the can whipped cream, so I had to make my own. If you've never done that before, all you need is heavy whipping cream, I used about a cup full, and a spoon of regular sugar to stabilize the cream. The sugar sweetens the cream, but it also stabilizes it, which is VERY important. It means that your whipped cream won't collapse, and turn back into a liquid state. Beat at a medium speed until the cream starts to stiffen and make little peaks. Don't over beat, you'll make butter! Either dollar on, or pipe with a bag and tip. I did it both ways, it looked great either way. Shake on sprinkles, and if desired, add the cherry! It's very, very yummy! Here is a picture of my version, and you can click here to visit Disney Food Blog and see a picture of the Disney version. Mine is smaller, and I don't have 3 inches of icing on there, but it's also not $6, yet still a generous portion, but not so much you can't finish it all, or feel obligated to share! What do you think? Are you going to try and make them this weekend? I will tell you...they only LOOK hard to make! 
1 Comment
7/6/2020 08:08:42 am
Looks yummy! Thanks so much for linking up with me at my #UnlimitedMonthlyLinkParty 14, open until July 26. All party entries shared if social media buttons installed. Leave a Reply. |
Archives
|

 RSS Feed
Photos from oneselfsacrifice, TheBetterDay, coconut wireless, shixart1985, Tambako the Jaguar, BudCat14/Ross, FrankHPhillips, xiquinhosilva, tcwmatt (on Hiatus), SV1XV, chocolatedazzles, philip.mallis, Castles, Capes & Clones, spablab, coconut wireless, V31S70, Joe The Goat Farmer, www.ralfsteinberger.com, gittaz, Castles, Capes & Clones, kellyhogaboom, Castles, Capes & Clones, verchmarco, gothopotam, shixart1985, Amaury Laporte, Virtual EyeSee, marada, slgckgc, Sam Howzit, wuestenigel, verchmarco, Dick Thomas Johnson, www.traveljunction.com, dulasfloyd, heymarchetti, MattCC716, PrincessAshley, Jamiesrabbits, spablab, meshmar2, Chuckcars, alexa fades away, wuestenigel
